Click any of the links above to find a Unit Study that I've designed (and usually tried with my own kids) just for homeschool families like you! This is a work in progress, so none of the units are completely finished, but hopefully you can find something you can use with your own family!

Search This Blog

Showing posts with label cooking. Show all posts

Cooking Lesson 6: Counting Calories


What is a Calorie? Calories are the energy within food. A calorie is the amount of energy it takes to heat up one gram of water. The average 8-year-old girl needs about 1,500 to 1,700 calories a day.

We are going to do a little practice with calories that requires you to use some math. Look at page 12 in your workbook. There is a list of foods and how many calories are in each food. Each yellow box lists the foods you are going to (pretend to) eat in one meal. Write down the number of calories in each food in the boxes and then add them up to find the total number of calories for each meal. This will give you an idea of how many calories you usually eat each day.

Do this worksheet now, then come back to this page.

******************************

Page 13 is similar to page 12, but it shows foods that you probably eat all the time but may not even realize they are unhealthy. After you add up the calories in these foods, you will see why they are so unhealthy. All those calories can give you a lot of fat that is hard to burn off! Do this worksheet for your homework. 

Now we are going to learn something completely unrelated to calories, but it is something exciting! We are going to learn how to use a knife. There is a little video to watch below. When you are done watching it, we will practice cutting a potato like they do, then we are going to make a Chicken Salad sandwich. There is a recipe for the Chicken Salad, but I'm going to show you how to add or change things in a recipe to make it closer to how you like it!


To print ahead of time:


Cooking Lesson 5: A Balanced Diet


So far we have learned how to be safe in the kitchen, and we have learned about a few of the tools and equipment we use to cook. Now, we are going to start learning a little about preparing a healthy meal. Part of being healthy means eating a "balanced diet."

A diet is the usual food and drinks a person consumes (or eats).

A balanced diet means eating the right types of food in the right amounts so that the body gets the nutrients it needs.

There are 7 nutrients in a balanced diet: 

1. carbohydrates (foods like bread, pasta/ noodles & rice)-- These are needed for growth & repair of different body functions

2. proteins (foods like meat, nuts, fish & eggs)-- These help keep your bowels working properly 

3. fats-- yes, some are good for you! Foods like butter, cheese, and oils can help you store energy.

4. vitamins- fruits, vegetables, milk, meat-- many different foods have vitamins we need to make our cells work properly

There are lots of different types of vitamins within this category.
If you look on page 11 in your Workbook, you will see a page that 
tells about some of these types of vitamins, what they do for your body and where you can find them. Look there now, then come back and finish reading. There's no quiz or anything-- I just want you to know!


5. minerals, which are found in food from plants, are also needed for energy to make cell membranes

6. water-- can also give you energy!

7. fiber (found in whole wheat grains/ breads & oatmeal)- makes body chemicals


Here is a little video that shows what you were just reading about:


Now we are going to get in the kitchen. Today we will learn how to prepare a good breakfast, with scrambled eggs, toast & sausage. The sausage is already cooked, but we will heat it up. There's no recipe to follow for this because it's really easy, but I will show you how to do it.


To print ahead of time:
"Eating Your ABC's..."


Cooking Lesson 3: Kitchen Utensils


Now you have learned about some of the appliances we use in the kitchen, and you have learned about the tools we need for cooking and baking. We still have one more type of tools we use in the kitchen and those are called "utensils." A utensil is any type of small tool we might use in our house, or in this case, our kitchen. 

We are going to do another "Scavenger Hunt" again this week. I am going to set out some of the tools we use often in the kitchen. I will give you a set of cards with pictures of the utensils, along with their name. Your job is to match the cards to the real-life items. Later you will have to match them using just their name, with no picture.


After we do the Scavenger Hunt, you will have to do Page 5 in your workbook for homework: the "Kitchen Tools Quiz." Your task is to draw a line to match the names of the appliances & utensils in the middle to their pictures on either side. 

Do the KITCHEN UTENSILS "SCAVENGER HUNT" with Mom now. Then do your Kitchen Tools Quiz and come back here to read the rest.

*****************************************


Up until now, I have just been showing you how to cook things. Now, you are going to learn how to read a recipe on your own. 

Click on THESE WORDS ONLY to go to a webpage that has a short lesson about how to read a recipe. Do not click on anything else on that page. When you are done, close the window and you will come back to this page.

Now we will practice making that smoothie recipe you just read! Do you remember what kitchen appliance we will use to make it?


To print ahead of time:
Utensils Picture Cards


Cooking Lesson 4: Measuring Tools

We have already learned a lot about the different tools and appliances used in the kitchen. Now we are going to learn about measuring. It is important to be able to measure correctly for your recipes to turn out the right way. 

The first type of measuring we will learn about is measuring "dry" ingredients. Dry measuring cups look like this:

dry measuring cups

Some examples of things we might measure with "dry" measuring cups are flour and sugar. Turn to page 6 in your workbook to read more about dry measuring and to do an activity. Later, we will practice using real measuring cups, but first come back here to read the rest!

******************

Another type of measuring cup we may use is a "liquid" measuring cup. They look something like this:

liquid measuring cup

What do you think we might measure in this?
Now, look at page 7 in your workbook. This explains what a "liquid"  measuring cup is for. Be sure to do the activity on that page, and then also work on page 8 for more practice. Come back to this page when you have done those 2 pages!

*******************

The last type of measuring we might do is with Measuring Spoons. These are used to measure small amounts-- either liquid or solid ingredients. They usually come in a set with 4 or 5 different measurements. Do the activity on page 9 to understand how you would use measuring spoons. Then come back here one more time!!

******************

On page 9 we will do some practice with all the cups & spoons to learn about fractions and "conversions." Conversion is when we change our measurements from one term to another (like cups to Tablespoons). It will be important to know how to do this later when we want to cut recipes in half to make less, or double them to make more! Today we will practice with water in the liquid cups and with rice in the dry cups. Be sure you are using your measuring cups the correct way to get an accurate measure. 

After we do this activity, we will really get in some practice by making some banana bread. I will give you a recipe to add to your very own recipe collection.


To print ahead of time:

"Kitchen Measuring" worksheets

Cooking School Fractions Recording Sheet

Banana Bread Recipe


Cooking Lesson 2: Kitchen Appliances, Cookware & Bakeware


Now that you know how to be safe in the kitchen, let's start learning a little about some of the tools you will use when you cook. 

Today we are going to go on a Scavenger Hunt to find and learn about the major appliances used in the kitchen, as well as things we will use to cook or bake. While you are reading this, I am putting out several different appliances, cookware and bakeware in the kitchen where you can easily see them. I will give you some cards with their names on them. Your job is to match the card to the correct item. This time you get to see the picture on your card. Later we will do it again with no picture.

Before we do this, here is a video that shows some more rules about being safe in the kitchen while using kitchen appliances and tools.


After our "Scavenger Hunt," you will get to use some of the appliances you might not have used before. We are going to use the toaster to practice making toast, and we will use the blender to make a milkshake.

That is all today! Now it is time to use your Kitchen Appliances Cards.


To print ahead of time:
Kitchen Appliances Cards


Cooking Lesson 1: Kitchen Safety


So you want to learn how to cook? You are about to get started on a fun journey to prepare to help make your own food! 

Congratulations! There are so many things to learn before you can prepare an entire meal on your own, and many of them aren't just about actually cooking! Over the next few months, you will learn about being safe in the kitchen, about food groups, calories, food labels, shopping for food, and balanced meals. You'll learn different words used in recipes and the tools you need to prepare them.

Today, before you can even start cooking, it is important that you know how to be safe in the kitchen, and how to handle food in a safe way. The first thing we are going to do is read together and sign the "Safety Rules When Cooking Contract." A contract is something you agree-- along with someone else-- to always remember to do. This is on page 1 in your workbook.


Of course you know that it can be dangerous to handle a sharp knife, but did you also know that it is dangerous to leave meat sitting out on the counter all day? Bacteria and other germs can grow on foods, especially meat, seafood (that's fish), eggs, poultry (that's what comes from a chicken), and fresh cut-up vegetables or fruits. These bacteria could give you food poisoning-- a really bad tummy ache! So in the cooking world, there is a rule called "Clean, Separate, Cook & Chill." These four words can help you remember how to handle food properly so you don't get sick!

First, watch this video to learn more about what I'm talking about.


Now we are going to read together page 2 & 3 of your workbook that talk a little more about food safety. They look like this:


Now you are going to get a chance to actually make something in the kitchen. We are going to do two things. The first one is learn how to hard-boil an egg. Eggs are one of those foods we learned about that can carry bacteria if you don't store them properly. When they are raw (not cooked) in the carton, you always keep them in the fridge! And they only last about 4 weeks before they are bad. When they are hard-boiled, they only last a week in the refrigerator. Hard-boiled eggs are good to eat plain, to make into deviled eggs, or to use in salads or sandwiches. Here is a little video about how to boil an egg.


The other thing were are going to make is Muddy Buddies. You won't actually get to "cook" these, but you will get to use the microwave and mix things together. And you will get to eat them.

For your homework, do the Food Safety Word Challenge on page 4 in your workbook to test what you learned about today.

Now go have fun in the kitchen!


Go to: Lesson 2


Cooking with Kids Unit (K4—>)


Week 1:

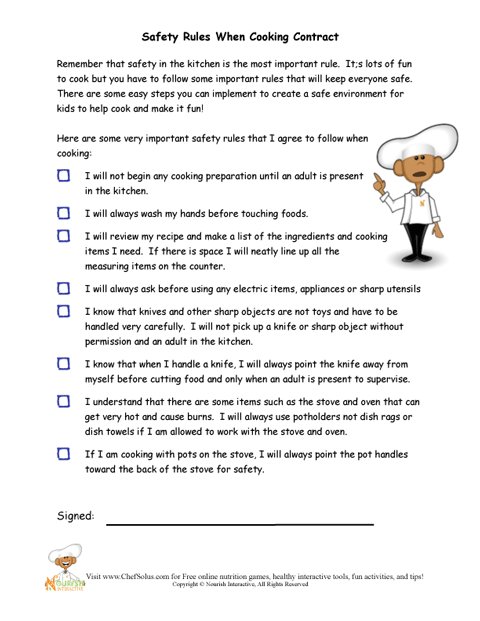
Cooking Safety Rules (Contract)
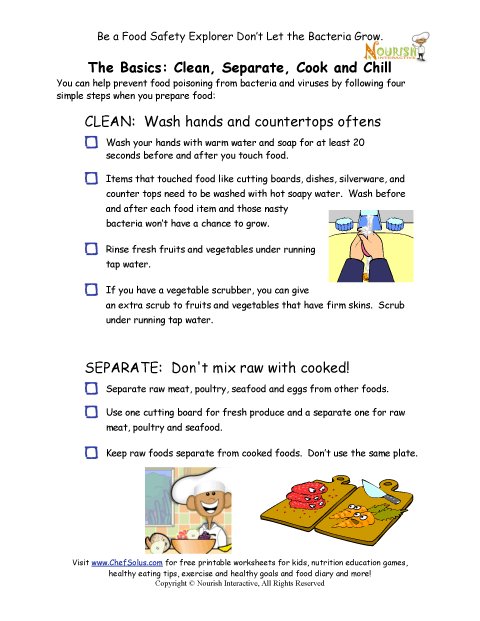
Food Safety in the Kitchen (Clean, Separate, Cook & Chill)
Recipe: Muddy Buddies


Week 2:

Cooking Vocabulary Words


Week 3:

Cooking Utensils
Cooking Appliances


Week 4:

Five Food Groups Learning Sheet


Week 2: Review Kitchen Safety Rules. Practice Spreading—Make Apple Frogs or Spiders

Week 3: Practice Peeling- Make egg boats, allowing child to peel the hard-boiled eggs. Or allow child to peel a banana. Review spreading—make a peanut butter & banana sandwich.

Week 4: Practice tearing & tossing- Make a green salad

Week 5: Practice Cutting & “My Favorite Fruits”-- Go to the grocery store together & pick out 5 or 6 types of fruits (some new, some favorites). Go home & make a fruit salad. Allow child to practice cutting some of the fruits using a butter knife. Complete the “My Favorite Fruits” portion of the lapbook using clipart of fruit. Allow the child to pick his/ her 5 favorite fruits from the pictures.

Week 6: “My Favorite Vegetables”—At the store, have child pick out several types of vegetables in order to make vegetable soup (some favorites, some new). Allow child to help cut the vegetables & mix the soup. Complete the “My Favorite Vegetables” portion of the lapbook using clipart.

Week 7: Learn about the Food Pyramid—Print out this copy for child to look at. Use a grocery store flyer or magazines to cut out pictures of food. Make a Food Pyramid on a large piece of paper and have child sort the pictures into the correct categories. Optional: Use my Five Food Groups Workbook for extra practice.

Week 8: Go to the grocery store for a special “tour.” Point out the layout of the foods, placing emphasis on the food groups. Use the store flyer to make a “Scavenger Hunt”—several items for the child to find and check off as you walk through. Point out unhealthy food choices.

Week 9: Learn about kitchen equipment. Put in plain sight all your kitchen appliances, pots, pans, cooking utensils, etc. Give child small cards with the names of each item on them. (Or if he is a writer, allow him to write himself.) Go on a scavenger hunt to label each item with the cards. Add the Kitchen Equipment page to your lapbook.

Week 10: Practice measuring. You could make any easy recipe for this. Make your favorite cookies or brownies. Allow child to use different measuring cups & spoons to follow the recipe and add the ingredients. You could also use this as a math lesson. Show how many teaspoons are in a Tablespoon or what 1/2 of a cup looks like.

Week 11: Practice rolling. Make Crescent Pepperoni Roll-Ups or these Chicken Roll-Ups, allowing child to roll the crescents.

Week 12: Have fun being creative! Make Bagel People or Fruit Kabob Creatures. Make a non-food recipe, like Play-Doh.

Week 13: Make a balanced meal together. Make it a big celebration of learning how to cook. Invite friends! Allow child to help as much as possible. Have her choose dishes she would like to eat, reminding her about the Food Groups and choosing from each. Find recipes for each dish and have child help you make a shopping list and then buy the necessary items. Make sure you also allow child to set the table properly and use the occasion to teach about Table Manners & Etiquette.

Download an Assistant Chef Cooking Certificate here!